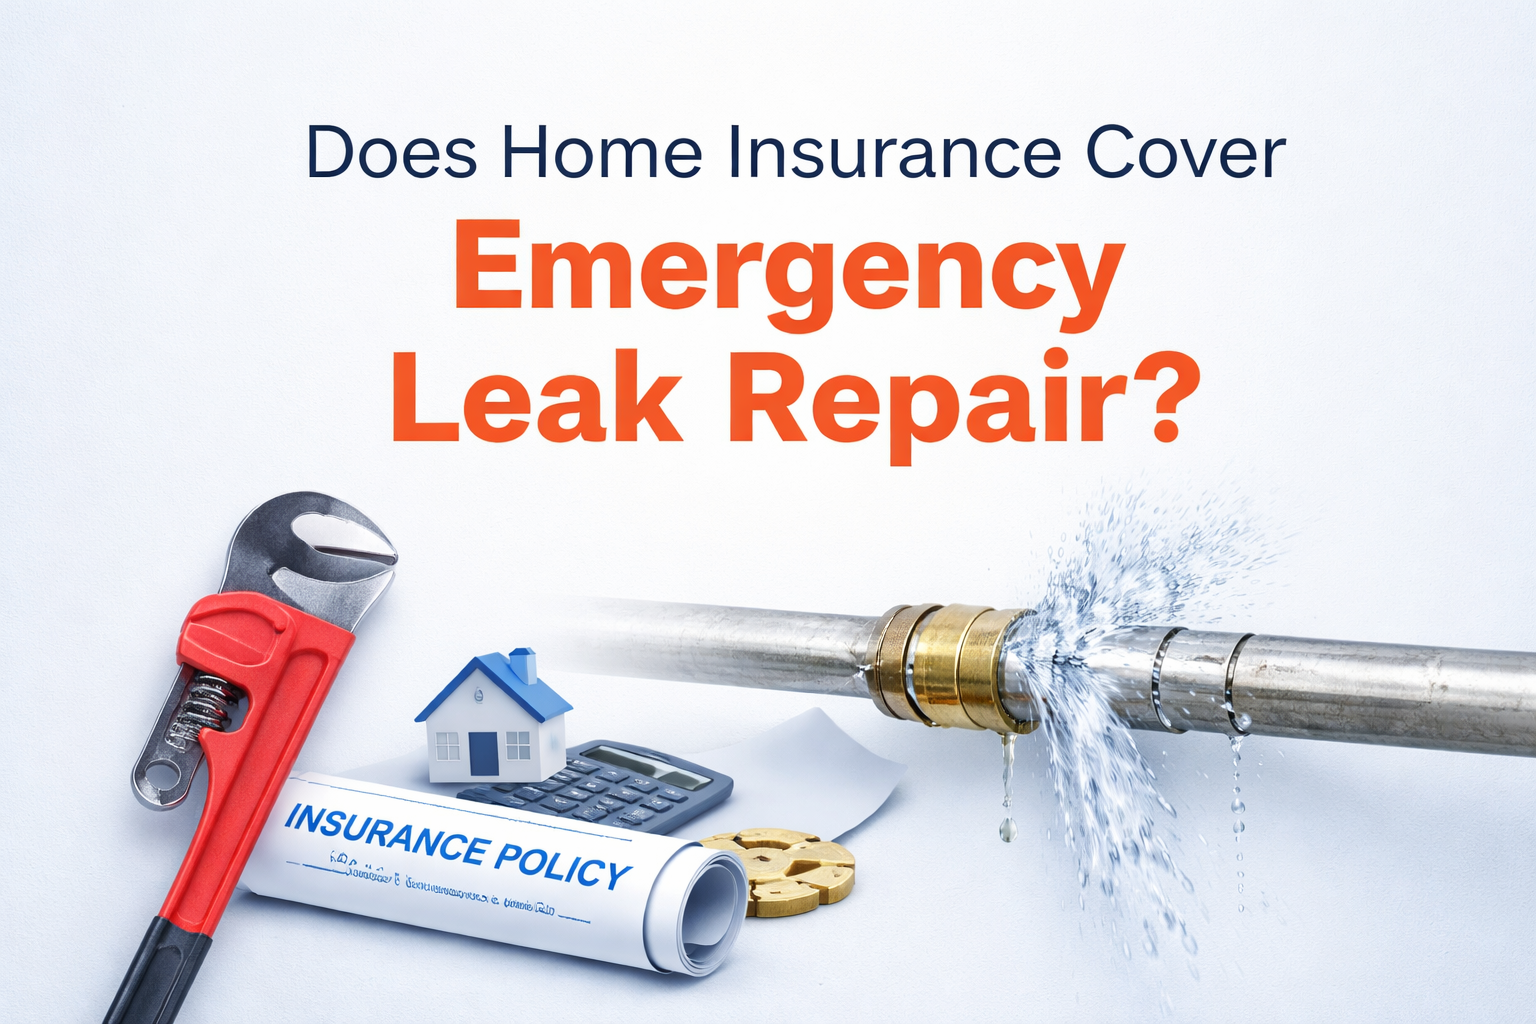
Does Home Insurance Cover Emergency Leak Repair?
When a pipe suddenly bursts or water starts pouring where it shouldn’t, the first concern is stopping the damage. Right after that comes another big question: Is home insurance going to cover this? The answer is often yes but not always, and the details matter more than most homeowners realize.
Make sure you understand how home insurance works so that you don’t end up paying from your pocket.
When Emergency Leak Repairs Are Typically Covered
Most standard home insurance policies cover sudden and accidental water damage. That means if a pipe bursts without warning, a water heater fails unexpectedly, or a supply line suddenly breaks, your policy will usually help cover the resulting damage.
In many cases, insurance covers the cost to repair the damage caused by the leak, such as soaked flooring, damaged walls, or ruined cabinets. Some policies may also cover the emergency service needed to access and repair the pipe, especially if cutting into walls or ceilings is required to stop the leak.
The key factor is that the leak was unexpected and not the result of long-term neglect. You might want to bring this up with the expert who comes to fix the leak that you would want to claim insurance for the repair cost so he can guide you on the nature of the leak and whether you are eligible or not.
When Coverage May Be Limited or Denied
Insurance companies are much less forgiving when leaks develop slowly over time. If a pipe has been dripping for weeks or months and eventually causes damage, insurers often classify that as a maintenance issue rather than an emergency.
Wear and tear, corrosion, aging pipes, or poor upkeep are common reasons claims get denied. For example, if a slow leak under a sink was visible but ignored, insurance may refuse to cover the repairs once the damage becomes severe.
Flooding from external sources, such as heavy rain or rising groundwater, is also not covered under standard home insurance. That type of water damage usually requires a separate flood insurance policy.
Does Insurance Pay for the Actual Leak Repair?
This is where homeowners are often surprised. While insurance usually covers damage caused by the leak, it may not cover the cost of fixing the pipe itself.
If a pipe bursts, the policy may pay to repair drywall, flooring, or cabinetry damaged by the water, but not the cost of replacing the failed pipe unless it was damaged by a covered event. Emergency access, such as opening walls to reach the leak, is more likely to be covered than the plumbing repair itself.
Some policies offer optional endorsements that expand coverage for plumbing repairs, so it’s worth reviewing your policy details before an emergency happens.
What Insurance Companies Expect You to Do
Insurance policies generally require homeowners to act quickly to prevent further damage. That means shutting off the water if possible and arranging emergency leak repair right away.
Delaying repairs can reduce or void coverage if the insurance company believes the damage worsened because of inaction. Taking photos, saving repair invoices, and documenting what happened can help support your claim.
Emergency repair services are often viewed positively by insurers because they limit the extent of water damage.
How Deductibles Affect Emergency Leak Claims
Even when a claim is approved, your deductible still applies. If the cost of repairs is close to your deductible amount, filing a claim may not make financial sense.
Emergency leak repairs can add up quickly, especially when water spreads through multiple rooms. In those cases, insurance coverage can significantly reduce out-of-pocket costs, even after the deductible.
What About Condos and Rentals?
Coverage works differently in shared living spaces. Condo owners typically rely on their personal condo insurance policy for interior damage, while the homeowners association’s master policy may cover shared plumbing and structural components.
Renters insurance usually covers personal belongings damaged by water, but not the building itself. Emergency leak repair for the structure typically falls on the landlord or property owner.
Knowing which policy applies can save time during an emergency when multiple parties are involved.
How to Avoid Claim Problems After a Leak
Regular maintenance is one of the best ways to avoid insurance disputes. Replacing old supply lines, maintaining water heaters, and addressing small leaks early can prevent emergencies and denied claims.
It also helps to understand your policy before something goes wrong. Many homeowners only read the fine print after a leak happens, when it’s already too late to adjust coverage.
When water is actively leaking, the most important step is stopping it fast. Insurance questions can be sorted out afterward, but acting quickly, documenting the situation, and using a professional emergency leak repair service can make the entire process far less stressful and costly.

The Most Common Drainage Problems Homeowners Deal With
Drainage problems are one of those issues many homeowners live with longer than they should. A soggy yard or a little water near the foundation might not seem urgent, but over time, it can become a leading cause of damage to the house.
Poor Grading Around the Foundation
Ideally, the soil around your home should slope away from the foundation so water naturally drains outward. When the ground slopes toward the house, rainwater collects along the foundation instead of moving away from it.
This often happens as soil settles over time or when landscaping changes alter the original grade. When water consistently pools near the foundation, it increases the risk of basement leaks, crawlspace moisture, and even foundation cracks which can cause termites to make it their home due to high humidity.
Standing Water in the Yard
If parts of your yard stay wet long after a rainstorm, it’s usually a sign that water has nowhere to go. Heavy clay soils, compacted ground, or low areas in the yard can all prevent proper drainage.
Standing water doesn’t just ruin grass and landscaping. It can attract mosquitoes, weaken soil, and eventually contribute to erosion or foundation issues if it occurs close to the home.
Gutter Problems and Roof Runoff
Gutters play a much bigger role in drainage than many homeowners realize. When gutters are clogged with leaves or debris, or when they aren’t sized or sloped correctly, water spills over the edge instead of being directed safely away.
That overflow often lands right next to the house, where it can soak into the soil near the foundation, rot fascia boards, stain siding, and contribute to basement moisture problems. You should always ensure that there is an opening for the gutters so they can be cleaned regularly of the debris.
Downspouts That Empty Too Close to the House
Even with clean, functional gutters, downspouts can still cause issues if they discharge water too close to the foundation. Roof runoff concentrates a large volume of water in a small area, overwhelming the soil’s ability to absorb it.
Over time, this can lead to erosion along the foundation and increase the chances of water finding its way into the basement or crawlspace.
Failing or Poorly Installed French Drains
French drains are commonly used to manage groundwater, but they’re only effective when installed correctly. Drains that lack proper slope, filter fabric, or the right materials can clog or stop working altogether.
Homeowners are often frustrated to discover that a French drain was installed but wet areas persist. In many cases, the issue is not the idea of the drain itself, but how it was designed or installed.
Water in Basements and Crawlspaces
Basement or crawlspace water is often a symptom of exterior drainage problems rather than an interior issue. When soil around the foundation becomes saturated, hydrostatic pressure pushes moisture through cracks and weak points in the foundation walls.
Left unaddressed, this moisture can lead to mold growth, musty odors, and unhealthy indoor air, as well as long-term structural concerns.
Driveways, Patios, and Hardscape Drainage Issues
Hard surfaces like driveways, walkways, and patios should be sloped so water drains away from the house. When these surfaces settle or are installed incorrectly, they can direct water straight toward the foundation.
This not only causes water pooling but can also accelerate cracking and damage due to freeze-thaw cycles in colder climates.
Sewer and Storm Drain Backups
In some homes, heavy rainfall leads to water backing up through floor drains or lower-level fixtures. This is often caused by tree roots in sewer lines, aging pipes, or municipal systems that can’t handle large volumes of stormwater.
These situations can escalate quickly and often require professional evaluation.
Erosion and Washed-Out Landscaping
Poor drainage often shows up as erosion. When water flows across the yard instead of soaking in or being properly directed, it carries soil with it. Over time, this can expose plant roots, undermine walkways, and create new low spots that hold even more water.
Drainage Problems Behind Retaining Walls
Retaining walls rely on proper drainage to relieve pressure from water buildup behind them. Without adequate drainage, water accumulates, increasing pressure on the wall.
This can cause retaining walls to crack, lean, or fail prematurely, which is both a safety issue and an expensive repair.
A word of caution
Drainage issues rarely resolve on their own. What starts as a small puddle or damp area can quietly turn into foundation damage, mold problems, or major structural repairs.

How to Lower Your San Antonio Energy Bill During 100°+ Summers
If you’ve lived in San Antonio for more than one summer, you already know the pattern: triple-digit temperatures settle in, your air conditioner runs nonstop, and your energy bill climbs right along with the heat. When daily highs stay above 100°, turning your AC on is not optional, it’s a must, but there are ways on how you can save on the energy bill.
Lowering energy costs during San Antonio’s hottest months usually comes down to how efficiently your home handles heat and how hard your HVAC system has to work to keep you comfortable.
Why Summer Energy Bills Spike So Quickly in San Antonio
During extreme heat, air conditioners don’t just run longer, they work harder. The bigger the gap between the outdoor temperature and your thermostat setting, the more electricity your system uses. Add high humidity, older equipment, or poor insulation, and energy usage increases even faster.
Many homes in San Antonio are also dealing with aging AC systems that were installed under older efficiency standards. Even if those units are still running, they often use significantly more power than modern systems designed for long cooling seasons. In our previous article, we have written a comparison on how much it would cost to maintain an old unit Vs installing a new AC unit to help make a decision.
Start With Your Thermostat Settings
Small adjustments can make a noticeable difference. Setting your thermostat a few degrees higher during the day especially when no one is home can reduce energy use without sacrificing comfort. Many households find that keeping the thermostat around 78° while home and slightly higher when away strikes a good balance during extreme heat.
Smart thermostats make this easier by learning your schedule and adjusting temperatures automatically, preventing unnecessary cooling when it’s not needed.
Make Sure Your AC Isn’t Working Against Itself
An air conditioner can only be as efficient as the conditions around it. Dirty air filters restrict airflow, forcing the system to run longer and consume more energy. During San Antonio summers, filters often need changing more frequently than homeowners expect.
Leaky ductwork is another common issue. Cool air escaping into the attic or walls means your system has to keep running to compensate, driving up monthly bills even though the thermostat never quite feels comfortable.
High-Efficiency Equipment Makes a Bigger Difference in Extreme Heat
In a mild climate, the difference between an older AC system and a newer one may be subtle. In San Antonio heat, that difference becomes obvious on your energy bill.
Modern high-efficiency systems with higher SEER2 ratings are designed to deliver more cooling using less electricity. Variable-speed systems, in particular, adjust their output gradually instead of cycling on and off at full power. This reduces energy spikes, improves humidity control, and keeps indoor temperatures more consistent during long heat waves.
Don’t Let Heat In If You Don’t Have To
Cooling costs rise when hot outdoor air constantly finds its way inside. Sealing air leaks around doors, windows, and attic access points can reduce the load on your AC system. Window coverings, solar screens, and reflective shades also help block direct sunlight during peak afternoon hours, when cooling demand is highest.
These improvements don’t require major renovations, but they can noticeably reduce how often your system has to run during extreme heat.
Maintenance Matters More Than Many People Realize
Regular HVAC maintenance helps systems run closer to their intended efficiency, especially during high-demand months. Low refrigerant levels, dirty coils, or worn components can all cause energy use to creep upward without obvious warning signs.
A system that’s tuned and operating properly will cool your home faster, cycle more efficiently, and handle heat waves with less strain, helping keep energy bills from spiraling during San Antonio’s hottest stretches.
When 100°+ days become the norm rather than the exception, reducing energy bills isn’t about one single fix. It’s usually a combination of smarter temperature control, efficient equipment, and making sure your home and HVAC system aren’t working harder than they need to. Even small changes can add up over the course of a long South Texas summer.
Old AC vs. New High-Efficiency System: Monthly Energy Bill Comparison for San Antonio Homes
If you live in San Antonio, you might have observed that your air conditioner probably runs more than any other appliance in your home. Between long summers, frequent heat waves, and high humidity, cooling costs can make up a large portion of your monthly energy bill. For many homeowners, the big question becomes whether it’s worth holding on to an older AC system or upgrading to a newer, high-efficiency model.
Let’s look at the monthly costs comparison for a new AC unit installation Vs an old AC unit to help evaluate the decision of maintenance Vs buying.
How Older AC Systems Drive Up Energy Bills
Most AC systems that are 10–15 years old were built to older efficiency standards. Many operate at lower SEER ratings and use single-stage compressors that turn on at full blast every time they run. In a climate like San Antonio’s, that constant on-off cycling uses more electricity and struggles to keep indoor temperatures steady.
As components wear down, older systems also lose efficiency. Even if the unit is still running, it may need more energy to produce the same amount of cooling it did years ago. This often shows up as steadily rising summer bills, especially during peak usage months.
What Makes High-Efficiency Systems Different
New high-efficiency AC systems are designed for exactly the kind of heat San Antonio experiences. Higher SEER2 ratings mean they deliver more cooling for every unit of energy used. Many modern systems also use variable-speed compressors, which adjust output gradually instead of running at full power all the time.
This allows the system to maintain comfortable temperatures more efficiently, reduce humidity, and run longer at lower speeds using less electricity overall while improving comfort.
Monthly Energy Bill Comparison
While every home is different, the table below shows a realistic comparison for a typical San Antonio household during peak cooling season.
| Feature | Older AC System (10–15 Years Old) | New High-Efficiency System |
| Typical SEER Rating | 10–13 | 16–20+ (SEER2) |
| Compressor Type | Single-stage | Variable-speed |
| Average Summer Runtime | Short, frequent cycles | Longer, lower-power cycles |
| Estimated Monthly Cooling Cost | $180–$250 | $110–$160 |
| Temperature Consistency | Uneven, hot spots | More even throughout the home |
| Humidity Control | Limited | Improved |
Over the course of a long San Antonio summer, that difference can add up quickly. Many homeowners see energy savings of 20–40 percent after upgrading, depending on home size, insulation, and usage habits.
Beyond the Utility Bill
Lower monthly energy costs are a big motivator, but they’re not the only factor. Newer systems tend to run quieter, place less strain on electrical components, and reduce the risk of breakdowns during extreme heat. They also work more effectively with smart thermostats, allowing for better control and scheduling.
For homeowners planning to stay in their home long term, the combination of energy savings, comfort improvements, and reliability often outweighs the upfront investment.
If your current AC is struggling to keep up or your energy bills seem out of proportion to your usage, comparing real monthly costs can be an eye-opening first step toward deciding what makes sense for your home. Think of a 15 year old AC unit as an old car, it will rattle, make noises and make you spend a lot more in HVAC maintenance than EMI of a new car.

Are you living in Texas with a dirty sock syndrome smell in your home?
If you live in San Antonio or Lubbock and your heater kicks on with a smell that reminds you of dirty gym socks, there’s a good chance you’re dealing with something HVAC pros call Dirty Sock Syndrome. It’s not just in your head and lately, we’ve been seeing it more and more across Texas.
At Leaky’s, we get calls every fall and winter from homeowners asking the same question: “Why does my house smell weird when the heat comes on?” and we are always happy to explain the causes and possible solutions to you on the phone.
What Dirty Sock Syndrome Actually Is
Dirty Sock Syndrome is that musty, sour odor that usually shows up when your system switches from cooling to heating. It’s most noticeable first thing in the morning or on the first chilly days of the season, and then it may fade as the system keeps running.
The smell typically comes from buildup on the indoor coil where dust and moisture create a space for bacteria to grow, and when warm air passes over it, the odor gets pushed straight into your home which can be extremely unpleasant especially when you have just woken up.
Why We’re Seeing It More in San Antonio and Lubbock
Texas weather plays a big role here, just in different ways depending on where you live.
In San Antonio, long cooling seasons and high humidity mean AC systems run hard for most of the year. That moisture sticks around on coils longer, which makes it easier for odors to develop when the heating season finally arrives.
In Lubbock, it’s a different challenge. Dust is a constant issue, and when that dust mixes with moisture inside an HVAC system, it can build up faster than homeowners expect. This problem worsens if filters aren’t changed regularly or airflow isn’t ideal.
On top of that, newer, high-efficiency systems are designed to hold onto moisture longer to save energy. That’s great for your utility bill, but it does mean HVAC maintenance matters more than it used to.
Is Dirty Sock Syndrome Something to Worry About?
For most people, Dirty Sock Syndrome is more annoying than dangerous. That said, it can affect comfort and indoor air quality, especially for anyone with allergies or sensitivities. And if the smell keeps coming back year after year, it’s usually a sign something inside the system needs attention, and would not go away with just a temporary fix.
What Usually Fixes It
In many cases, the solution starts with a thorough cleaning of the indoor coil. Once the buildup is removed, the smell often disappears. Depending on the home and system, other options might include improving airflow, addressing humidity, or adding treatments that help prevent bacteria from coming back.
The key is finding the root cause rather than masking the odor with sprays or air fresheners, those don’t last and don’t solve the problem. If you are comfortable cleaning the coil yourself, then just a vacuum and a dry cloth might do the trick. If you are worried that you might end up breaking something while cleaning then don’t hesitate to give us a call.
How to Reduce the Chances of It Coming Back
Regular maintenance goes a long way, especially in Texas. Changing filters on schedule, keeping humidity under control, and having the system checked before seasonal changes can help prevent that first cold morning surprise.
If your system smells fine during the cooling season but starts acting up the moment the heater runs, then it could be some issue with the heating coil and worth getting an inspection done.
Dirty Sock Syndrome might sound funny, but if your home smells less than fresh when the heat comes on, your HVAC system is probably trying to tell you something — and it’s usually an easy fix once you know what to look for. Be careful of those big HVAC companies who might scare you with big words and push you to replace the entire HVAC system when all it needed was a good cleaning.
What Is HVAC Test and Balance (TAB)?
Most people think of their HVAC system as something that either works or doesn’t. If the air turns on and the temperature eventually feels right, it’s easy to assume everything is fine. But many heating and cooling systems that seem “normal” aren’t actually performing the way they were designed to. That’s where HVAC Test and Balance, often called TAB, comes in.
What Test and Balance of An HVAC System Actually Means
HVAC Test and Balance is the process of measuring, adjusting, and verifying how air moves through your heating and cooling system. The goal isn’t just to make sure air is blowing, but to make sure the right amount of air is reaching each room, at the right pressure, and at the right temperature. When a system is properly tested and balanced, it operates more efficiently and keeps the space more comfortable.
Why Airflow Matters More Than You Think
At its core, TAB focuses on airflow. Every HVAC system is designed with specific airflow requirements. Each room needs a certain amount of conditioned air to maintain consistent comfort. Over time, or even right after installation, those airflow levels can be off. Ductwork may not be adjusted correctly, dampers might be partially closed, or system changes could throw everything out of balance. Test and balance identifies those issues and corrects them.
What Happens During HVAC Test and Balance
During a TAB process, an expert HVAC technician uses specialized instruments to measure airflow, temperature, and pressure throughout the system. Supply and return air are checked, air volumes are compared to design specifications, and adjustments are made to bring the system back into alignment. This can include setting dampers, adjusting fan speeds, or correcting airflow restrictions. Nothing is guessed. Everything is measured and verified.
Signs a System May Be Out of Balance
One of the biggest signs that a system hasn’t been properly balanced is uneven comfort. Some rooms may stay too warm while others are always cold. You might notice weak airflow from certain vents, or rooms that never quite reach the thermostat setting. In many cases, the equipment itself isn’t the problem. The air just isn’t being distributed correctly.
How TAB Affects Energy Efficiency
Energy efficiency is another reason TAB matters. When airflow is off, your system has to work harder to maintain temperature. That leads to longer run times, higher energy bills, and unnecessary wear on equipment. A balanced system delivers air where it’s needed without overworking the unit, which can help extend the life of the HVAC system and reduce operating costs.
Does a New HVAC System Need Testing and Balancing
Test and balance is especially important for new installations. Even a brand-new HVAC system can underperform if it hasn’t been properly balanced. Construction tolerances, duct layout, and field adjustments all affect airflow. TAB ensures the system operates as it was designed to from day one, rather than relying on assumptions.
When Test and Balance Is Most Useful
It’s also common after renovations, equipment upgrades, or changes to ductwork. Any time a system is modified, airflow can shift. What worked before may no longer be correct. Testing and balancing helps reset the system so everything works together again.
Why TAB Is Often Overlooked
Many homeowners and building owners aren’t aware that TAB is even an option. They assume comfort issues mean replacing equipment or living with the problem. In reality, testing and balancing is often a practical step that improves comfort, efficiency, and performance without major changes to the system. Think of this as wheel alignment of a car, test and balance is just like that.
What Properly Balanced HVAC Feels Like
HVAC Test and Balance isn’t about making the system louder, stronger, or more aggressive. It’s about precision. When air is delivered evenly and intentionally, the system feels quieter, rooms stay more consistent, and the HVAC equipment doesn’t have to fight against itself.
When TAB Might Be the Right Step
If your system struggles to keep up, certain rooms never feel right, or energy costs seem higher than they should be, TAB may be the missing piece. It’s a behind-the-scenes service that makes a noticeable difference in how your HVAC system actually performs day to day.
Emergency Leak Repair for Apartments & Condos: Who’s Responsible?
Few things cause panic faster than discovering a water leak in an apartment or condo. Water dripping from the ceiling, soaked floors, or a sudden burst pipe doesn’t just affect one unit and it can quickly spread to neighbors and shared spaces. One of the first questions people ask in these situations is simple but stressful: Who’s responsible for fixing this?
The answer isn’t always straightforward. Responsibility for emergency leak repair in apartments and condos depends on where the leak originates, what type of property it is, and how ownership is structured.
Why Leaks Are More Complicated in Apartments and Condos
Unlike single-family homes, apartments and condos share walls, plumbing lines, ceilings, and sometimes even water heaters. A leak in one unit can easily damage multiple units or common areas. That shared infrastructure means responsibility is often split between individual owners, landlords, and homeowners’ associations (HOAs).
In emergencies, delays caused by confusion can make water damage much worse. That’s why it’s very important to understand who is responsible for fixing the leak before the damage becomes irreparable.
Who should fix the leak if you are living in a rental apartment?
If you live in a rental apartment, responsibility is usually clearer.
In most cases, the landlord or property management company is responsible for emergency leak repair. This includes:
- Burst pipes inside walls
- Leaks from ceilings or floors
- Plumbing failures not caused by tenant misuse
- Water line or fixture failures that happen suddenly
As a tenant, your responsibility is to report the leak immediately. Waiting too long can sometimes make you partially liable if the damage worsens due to delayed reporting. You generally should not attempt major repairs yourself, especially during an emergency, unless your lease specifically allows it.
That said, tenants may be responsible if the leak was caused by negligence, such as damaging pipes during renovations or ignoring a slow leak for weeks.
Who should fix the leak if you are living in Condos: Owner vs HOA
Condos are more complex because ownership is split between individual units and shared property.
When condo owners need to fix a leak?
Condo owners are typically responsible for anything inside their unit’s boundaries, which often includes:
- Plumbing fixtures like sinks, toilets, and faucets
- Pipes that exclusively serve their unit
- Appliances such as dishwashers or washing machines that cause leaks
- Water damage inside their unit caused by internal plumbing issues
If a leak starts from your washing machine hose and damages your unit or the unit below, repairs often fall under your responsibility and insurance.
When is the HOA responsible to fix the leak?
The HOA generally handles common elements shared by all the condos in the building, which may include:
- Main water supply lines
- Pipes inside walls that serve multiple units
- Roof leaks
- Shared plumbing stacks
- Structural components
If a leak originates from a shared pipe or building infrastructure, the HOA usually coordinates emergency repairs. However, even if the HOA fixes the source, unit owners may still be responsible for repairs inside their own units unless HOA bylaws state otherwise.
What Happens When the Source Isn’t Clear
In many emergency leak situations, it’s not obvious where the water is coming from. Water may appear in one unit but originate several floors above or behind walls.
In these cases, emergency leak repair professionals often focus first on stopping the water, even before responsibility is fully determined. Once the source is identified, property managers, HOAs, and insurers can sort out costs afterward.
The priority should always be minimizing damage. Sorting out blame can wait until the emergency is under control.
Insurance and Emergency Leak Repairs
Insurance plays a major role in apartment and condo leak situations.
- Tenants usually rely on renters insurance for damage to personal belongings.
- Condo owners often use personal condo insurance (HO-6 policies) for interior damage.
- HOAs typically carry a master policy that covers common elements.
Insurance coverage varies widely, so it’s worth reviewing your policy before an emergency happens. Some policies cover sudden leaks but exclude damage from ongoing or poorly maintained issues.
What to Do When a Leak Happens
When water is actively leaking, speed matters more than paperwork.
First, shut off the water if you can safely do so. This might mean turning off a unit-level valve or, in some cases, contacting building maintenance to shut off a shared line.
Next, notify the appropriate party immediately. Tenants should contact their landlord or property manager. Condo owners should alert building management or the HOA, even if they believe the leak is inside their unit.
Calling an emergency leak repair service early can help locate the source quickly and prevent damage from spreading. Professional leak detection and repair can often reduce repair costs overall, even if multiple parties are involved.
Time is of essence when it comes to leak repair
In apartments and condos, leaks don’t stay contained. Water follows gravity and finds pathways through walls, ceilings, and electrical systems. What starts as a small leak in one unit can become a major building issue within hours.
Fast emergency response helps:
- Limit damage to neighboring units
- Reduce mold risk
- Protect structural elements
- Avoid disputes over delayed action
Property managers and HOAs often prefer working with emergency repair services that understand multi-unit buildings and can coordinate repairs efficiently.
Preventing Future Leak Emergencies
While emergencies can’t always be avoided, regular maintenance helps reduce risk. Condo owners and landlords should inspect appliances, hoses, and visible plumbing connections regularly. HOAs should maintain shared plumbing systems and address small issues before they escalate.
Clear communication between residents, property managers, and HOAs also makes emergencies easier to manage when they happen.
When leaks occur in apartments and condos, responsibility depends on the source, ownership boundaries, and building rules. What matters most in the moment is stopping the water quickly and getting professional help. The faster the response, the easier it is for everyone involved to recover and move forward.